
Connect Stripe
Use a restricted live Stripe key to display eligible purchases and newly started subscriptions in popups.
On this page
Connect the Stripe account that takes payments for your project. You need permission to create a restricted live API key in that account.
Create a restricted key
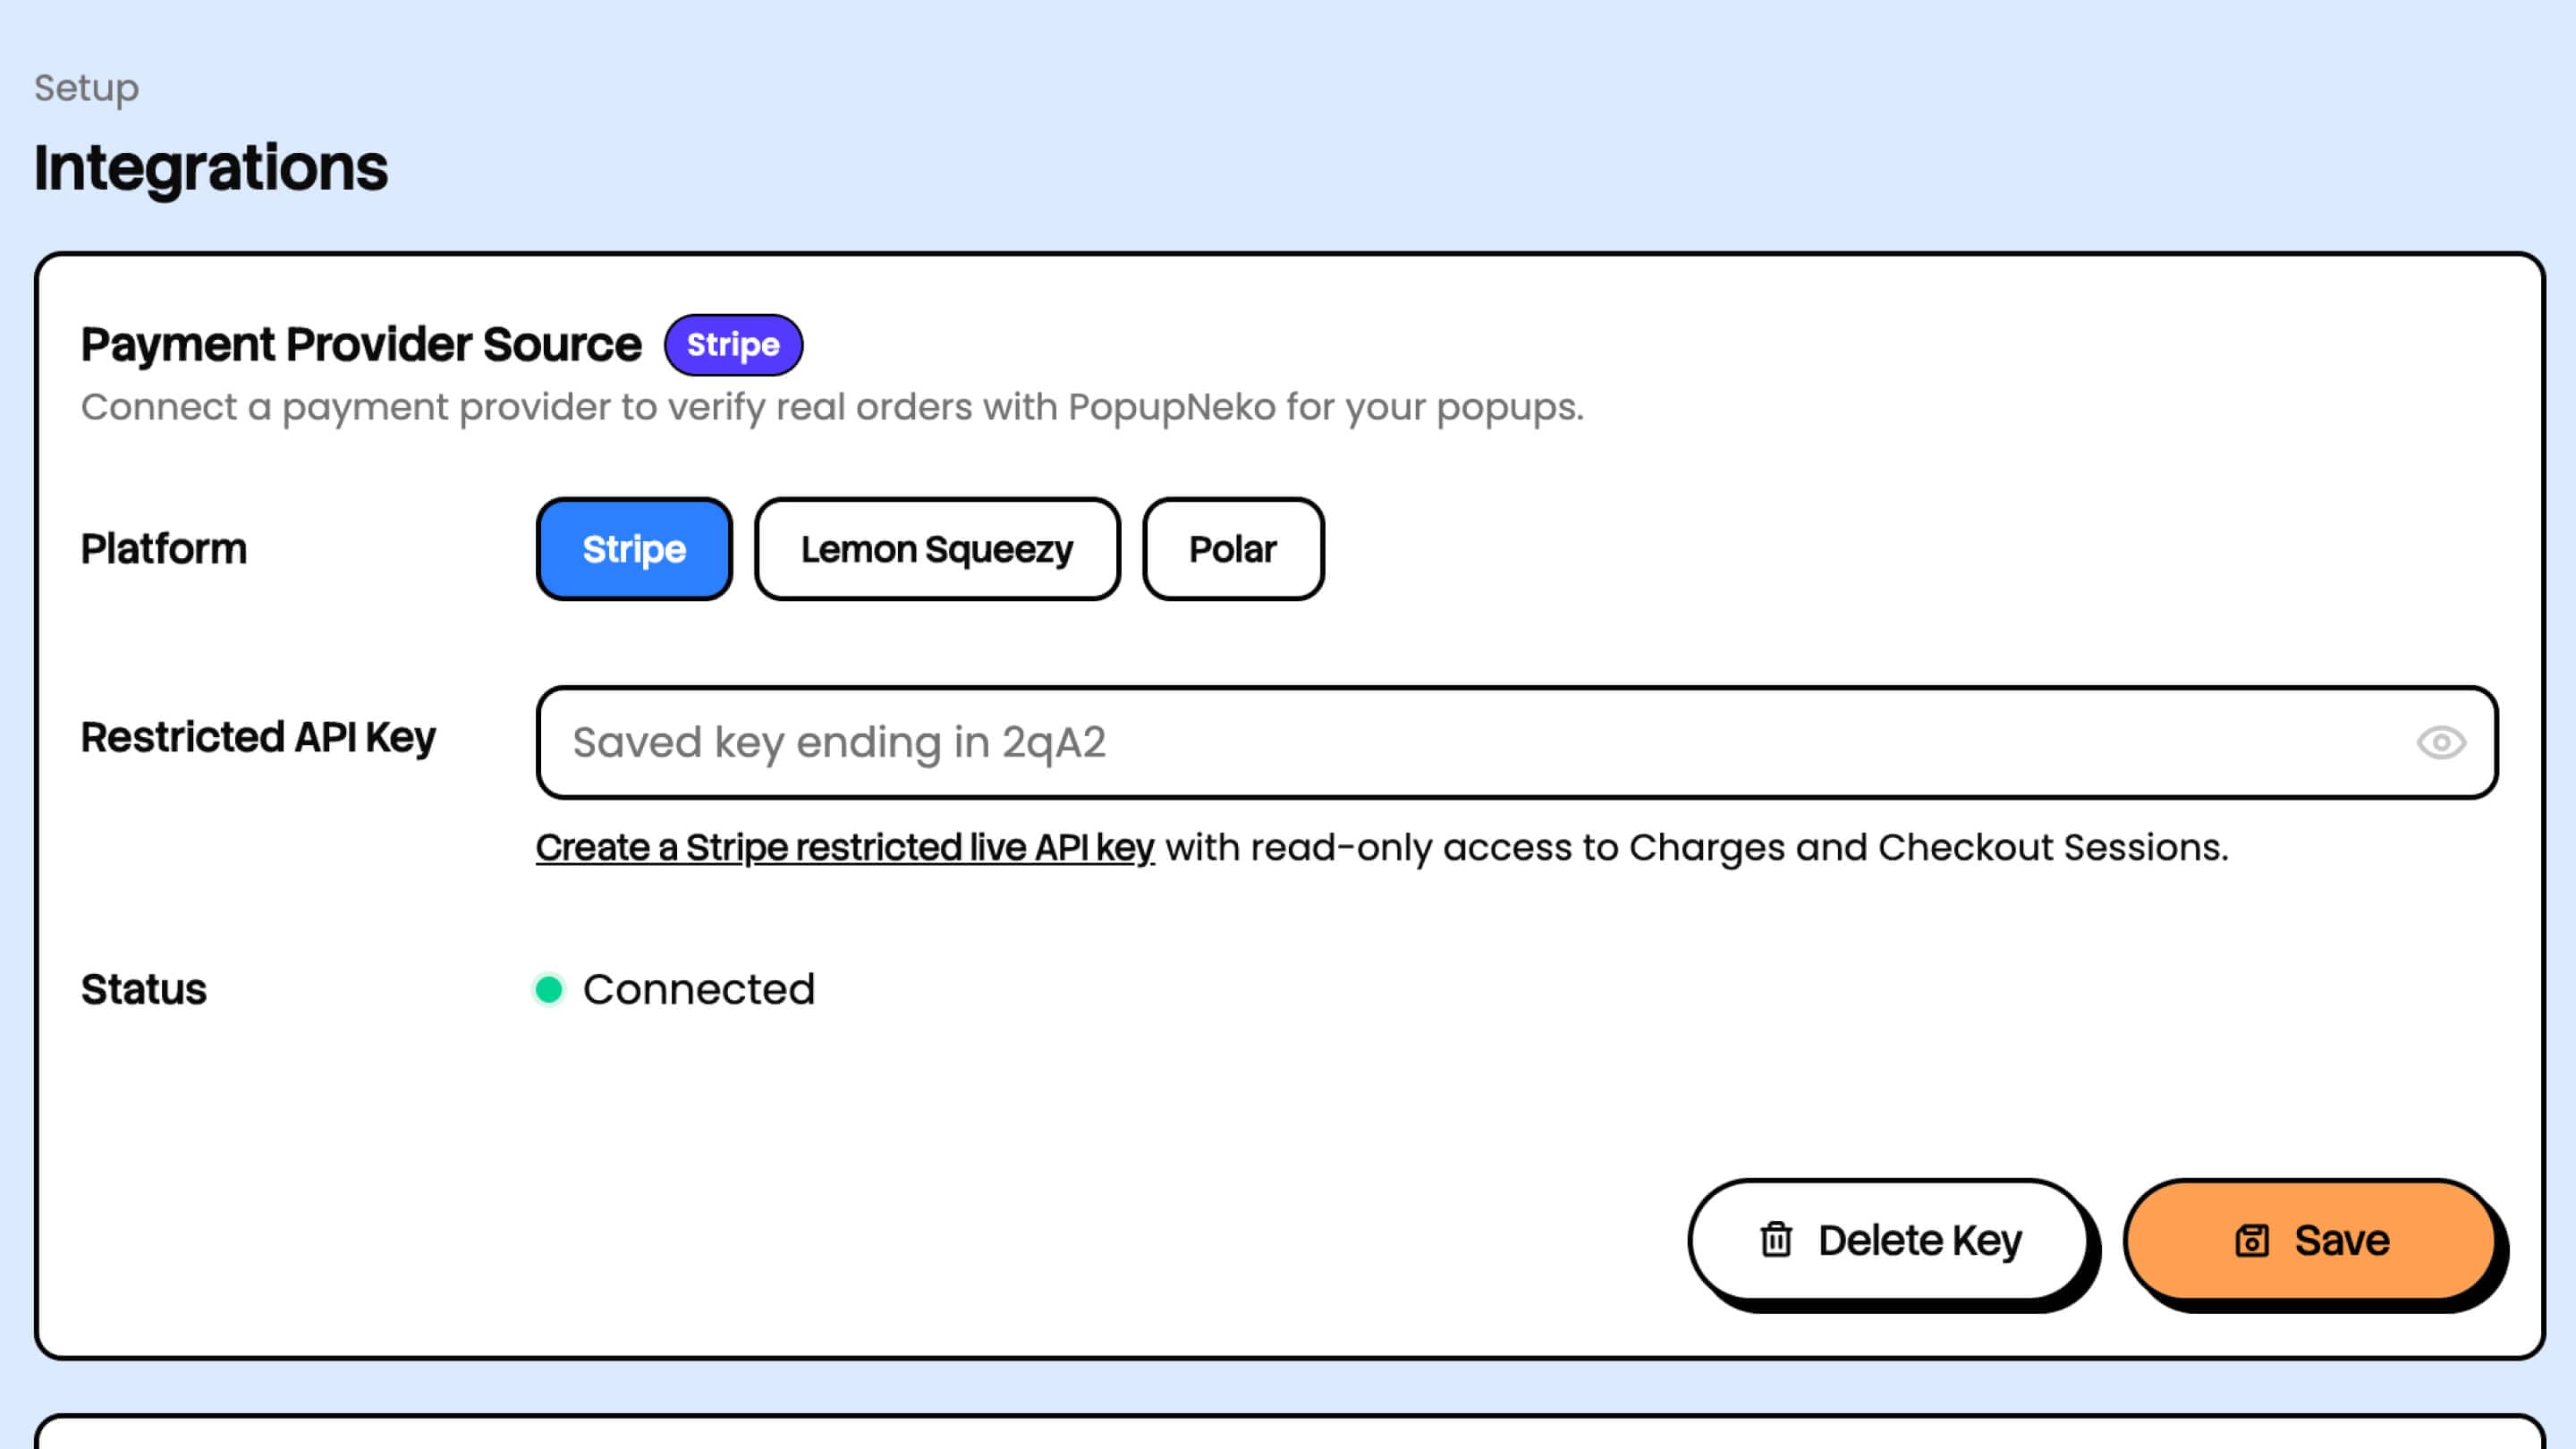
- Open your project's Integrations page and select Stripe under Payment Provider Source.
- Click on Create a Stripe restricted live API key. The dashboard link auto prefills the connection's required permissions for you.
- Confirm you are in live mode and give the key read access to Charges and Checkout Sessions only, as shown in the PopupNeko form.
- Create the key and copy it into PopupNeko's Restricted API Key field.
- Choose Save and check for Connected status.
Use a restricted key beginning with rk_live_. Publishable keys, unrestricted secret keys, and webhook signing secrets are not accepted for this connection. Production setup uses live data. See Stripe's API key guide for creating and managing restricted keys.
Which Stripe activity appears?
Eligible paid Checkout Sessions in payment mode supply sale events, with one popup event per distinct product. Checkout Sessions in subscription mode supply newly started subscription events. Direct Charges and recurring subscription renewals are excluded from the popup feed.
A payment can exist in Stripe without appearing in PopupNeko. Check that it came through the supported Checkout flow, belongs to this account, and is recent enough for your saved Events setting.
Location text depends on the address data available from Stripe. If a city is unavailable, PopupNeko can fall back to the country when country display is enabled. It does not invent a customer's location.
Troubleshoot the connection
If saving fails, check and see if the live mode api key, the selected Stripe account, the full key value, and its read permissions are correct. If product sync reports a Stripe permission error, review the key's read access for the requested resource in Stripe and retry the sync.
For a connected account with no popups, check supported Checkout activity, saved event types, access, and page targeting. Troubleshooting covers these checks in order.
To rotate or delete a key, follow connection management. Keep your key out of client code and screenshots.
Configure the popups
Use Customize to customize your popups appearance to match your brand. Open Products and manually sync your active products to customize product names, images, and links in the popups. Then enable the relevant event types in Events, choose the age window, and save. Guides are available under Popup Customization - All Guides.
Finish with installing the popup script on your site. Follow the installation guide if needed.